Sublimation vs DTF Printing: Step by Step
On this page (7 sections)
- Understanding the Step-by-Step Processes for Sublimation and DTF Printing
- How Sublimation Printing Works: A Step-by-Step Look
- How DTF Printing Works: A Step-by-Step Guide
- Comparing Sublimation and DTF: Key Differences at a Glance
- Making Your Final Choice: A Quick Checklist
- Conclusion
- Frequently Asked Questions
Choosing between sublimation vs DTF printing depends on what you want to print and on what fabric. Sublimation is best for polyester fabrics and produces vibrant, permanent designs that feel like part of the shirt. DTF (direct-to-film) printing works on a wider range of materials, including cotton, and can achieve opaque, detailed prints.
Both methods offer excellent ways to create custom apparel, but they have different strengths. Sublimation inks turn into gas when heated, bonding directly with polyester fibers for a soft feel. DTF printing uses a special ink and a powder adhesive applied to a film, which is then transferred to your garment with heat, making it more versatile for different fabrics like cotton blends.
- Sublimation works best on 100% polyester.
- DTF printing works on most fabrics, including cotton.
- Sublimation prints are very soft and breathable.
- DTF prints can have vibrant colors and good opacity.
- Consider your fabric type and desired feel for the best choice.
Let’s break down each process step by step so you can decide which printing method is right for your project.
Understanding the Step-by-Step Processes for Sublimation and DTF Printing
Choosing the right custom apparel printing method can feel like a puzzle. You want your designs to look amazing and last. We’ve researched both sublimation and Direct-to-Film (DTF) printing to explain exactly how they work. This guide walks you through each step, helping you see which one fits your needs best.
How Sublimation Printing Works: A Step-by-Step Look
Sublimation printing is like magic for polyester. It uses special inks that change from a solid to a gas when heated. This gas then soaks right into the fabric fibers. It’s a permanent process that doesn’t feel like anything on the shirt. It’s perfect for vibrant, full-color designs that truly become part of the garment.
Step 1: Designing Your Masterpiece
Everything starts with your design. You’ll create your artwork using design software. Think about the colors you want and how detailed the image needs to be. High-resolution images are key for the best results. You’ll want your design to be the exact size you intend to print it.
Step 2: Printing the Design with Special Ink
Next, you print your design onto special sublimation paper. This paper has a coating that holds the special sublimation ink. Your printer uses these unique inks, which are crucial for the process. The colors you see on the paper might look a little dull at this stage; that’s normal.
Step 3: The Heat Transfer Magic
This is where the transformation happens. You place the printed sublimation paper onto your polyester fabric. Then, you use a heat press. The heat press applies both high temperature and pressure. We found that typically temperatures around 375-400°F (190-205°C) are used for about 45-60 seconds.
What Happens During Heating?
Under the heat and pressure, the sublimation inks turn into a gas. This gas then permeates the polyester fibers. It bonds with the fabric on a molecular level. This means the ink doesn’t just sit on top; it becomes one with the shirt. Research from textile science confirms this gas transfer is what makes sublimation permanent.
Step 4: Revealing Your Vibrant Print
Once the heat press cycle is done, you carefully remove the paper. The design is now permanently infused into the fabric. The colors will appear much brighter and more vibrant than they did on the paper. Many experts suggest letting the garment cool completely before handling or wearing.
Sublimation: Best For…
- 100% Polyester Fabrics: This is where sublimation truly shines.
- Light-Colored Garments: White or light-colored shirts work best.
- Full-Color, Photo-Realistic Designs: Great for complex graphics.
- Breathable, Soft Feel: The print feels like part of the fabric.
How DTF Printing Works: A Step-by-Step Guide
Direct-to-Film (DTF) printing offers a different approach. Instead of printing directly onto the garment, you print onto a special film. Then, a powder adhesive is applied. Finally, this film is transferred to your fabric using a heat press. This method is super versatile and can work on a wide range of materials.
Step 1: Design Creation and Preparation
Like sublimation, your design journey begins with creating your artwork. You’ll use design software to get your image ready. Vector graphics are often preferred for DTF for sharp lines. You’ll also need to set up your file in a specific way for the DTF printer, often with a white layer behind the colors.
Step 2: Printing Onto the Transfer Film
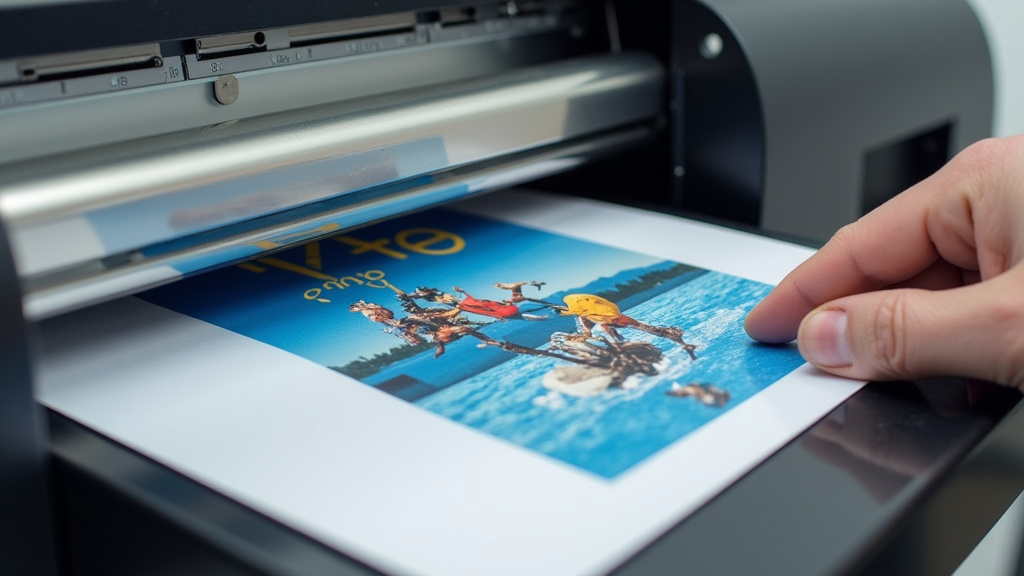
Here’s where DTF differs significantly. Your design is printed directly onto a special PET (polyethylene terephthalate) film. This is not sublimation paper. The printer uses specialized DTF inks. These inks are formulated to adhere to the film and then bond with the adhesive.
The White Ink Layer
A crucial part of DTF printing is the application of a white ink layer behind your design. This white ink acts as an opaque base. It ensures that your colors pop vibrantly, even on dark fabrics. Without it, the fabric color would show through the design, dulling the effect. We found this white layer is what gives DTF its great opacity.
Step 3: Applying the Adhesive Powder
After printing, while the ink is still wet, you’ll apply a special hot-melt adhesive powder. This powder sticks to the wet ink. You’ll then shake off any excess powder. The powder forms a layer on top of the ink. This powder is what allows the design to stick to the fabric later.
Step 4: Curing the Film
The film with the ink and powder needs to be “cured.” This means heating it to melt the powder and create a durable transfer sheet. This can be done in an oven or a special curing unit. Once cured, the film is ready to be stored or immediately used for transfer. Many users report that allowing it to cool completely makes it easier to handle.
Step 5: Heat Transfer to Your Garment
Now, you place the DTF transfer film onto your chosen garment. Position it exactly where you want the design. You then use a heat press to apply heat and pressure. Typical settings might be around 300-325°F (150-160°C) for 10-15 seconds.
Hot Peel vs. Cold Peel
After pressing, you’ll peel off the PET film. There are two main types of transfers: hot peel and cold peel. A hot peel transfer can be removed immediately after pressing. A cold peel transfer requires you to wait until it cools down. Always check the manufacturer’s recommendations for your specific transfer film.
Step 6: Final Touches and Wearability
Once the film is peeled away, your design is fully transferred to the fabric. The adhesive has bonded the ink to the material. The resulting print is durable and can have a slightly thicker feel than sublimation, but it’s still flexible. Research indicates that proper washing extends the life of the print.
DTF Printing: Best For…
- All Fabric Types: Works well on cotton, polyester, blends, and more.
- Dark and Light Garments: The white ink base ensures vibrant colors.
- Detailed and Opaque Designs: Excellent for logos and graphics with fine lines.
- Versatile Application: Can be used on t-shirts, hoodies, bags, and more.
Comparing Sublimation and DTF: Key Differences at a Glance
We’ve seen how each process works. Now let’s compare them side-by-side. Understanding these differences helps you make the best choice for your project.
| Feature | Sublimation Printing | DTF Printing |
|---|---|---|
| Best Fabric Type | 100% Polyester | Cotton, Polyester, Blends, Nylon, Leather, etc. |
| Color Vibrancy | Extremely vibrant on light colors | Vibrant on all colors, including darks |
| Design Feel | Soft, breathable, part of the fabric | Slightly raised texture, durable |
| Ink Type | Sublimation ink | Special DTF ink |
| Transfer Medium | Sublimation paper | PET film with adhesive powder |
| Setup Process | Print & Press | Print, Powder, Cure, Press |
| Complexity | Simpler process | More steps involved |
Making Your Final Choice: A Quick Checklist
Still wondering which is right for you? Ask yourself these quick questions:
- What fabric will I be printing on? (Polyester for sublimation, almost anything for DTF).
- What color is my garment? (Light for sublimation, dark or light for DTF).
- What kind of feel do I want? (Completely smooth for sublimation, slightly textured for DTF).
- How detailed are my designs? (Both handle detail, but DTF excels with fine lines on darks).
- Am I ready for more steps? (DTF has more steps than sublimation).
Conclusion
You’ve now seen how both sublimation and DTF printing create amazing custom apparel, but they each have their perfect use cases. Sublimation is your go-to for vibrant, breathable prints on 100% polyester, especially light-colored items. DTF offers incredible versatility, working on various fabrics like cotton and dark colors thanks to its opaque white ink base and adhesive powder. Your choice hinges on your fabric, garment color, and desired print feel. Ready to start? Consider the fabric of your next project and select the method that will bring your design to life best.
Frequently Asked Questions
Which printing method is better for cotton t-shirts?
DTF printing is generally better for cotton t-shirts. Sublimation requires polyester to bond properly, while DTF’s adhesive powder allows it to transfer effectively onto cotton and cotton blends. You’ll get vibrant, durable results on cotton with DTF.
Can I do sublimation on dark fabrics?
No, sublimation printing does not work well on dark fabrics. The inks are transparent and need a white or very light background to show their true colors. For dark garments, DTF printing is the recommended choice.
How does the feel of a sublimation print compare to a DTF print?
Sublimation prints feel like part of the fabric because the ink infuses into the polyester fibers, creating a very soft and breathable print. DTF prints have a slight texture because the ink and adhesive sit on top of the fabric, offering durability.
Is DTF printing more complicated than sublimation?
Yes, DTF printing involves more steps than sublimation. You need to print onto a film, apply adhesive powder, cure the film, and then press it onto the garment. Sublimation is a simpler print-then-press process.
What kind of designs are best for each method?
Sublimation excels at full-color, photographic designs on polyester due to its broad color gamut. DTF printing is excellent for detailed logos, text, and designs with fine lines, especially on non-polyester fabrics or dark garments where opacity is key.